Categories: Featured Articles » Sharing experience
Number of views: 61156
Comments on the article: 0
How to make a starry sky ceiling using fiber optic
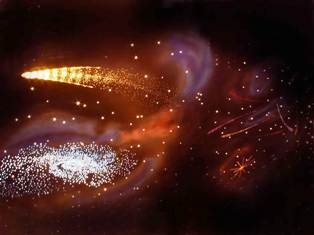
 Today, the light decoration of a room not only fulfills its main function, but also brings elements of comfort to the surrounding space. The interior will look more vivid and original if you arrange suspended ceilings in the shape of a starry sky. Such a ceiling will be a great alternative to the traditional lighting in your room. The star ceiling will decorate your room.
In addition, with the help of this design it is possible to identify the functional areas of the premises. So, you can separate the workspace from, for example, a recreation area.
The modern and most realistic "star ceilings" are usually made using fiber optic technology (see fiberoptics) and microprocessor control.
Consider the process of creating fiberglass and projector ceiling.
Tools and materials for creating a "star" ceiling:
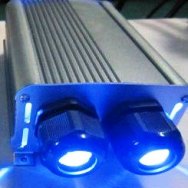 1. LED or halogen projector. The cost of such systems is in the range of 7000-11000 rubles. Projectors can work in different modes and with different luminosity programs. The projector is small and quiet.
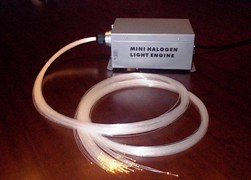
2. A set of optical fibers that are combined in one port. There are many variations of such kits. The cost varies from 5 to 50 thousand rubles. Different sets cover a different area and have different diameters.
Lighting using fiber optics differs from other types of lighting in the following properties: electrical safety, fire safety, high moisture resistance and durability, as well as low energy consumption. So, the entire ceiling will consume only 10-50 watts of electricity.
3. Sheet material. The thickness of the sheet material is about 1 cm. The effect of the starry sky can be created on the basis of almost any material endowed with sufficient rigidity. Tiles, MDF panels, plasterboard sheets and plywood sheets can be used.
First of all, experts recommend the use of the following materials: polyvinyl chloride and laminate. After all, airbrushing and acrylic paints fit well on such materials. After carrying out all the work on arranging a star ceiling, a similar ceiling can be washed with ordinary detergents.
4. Sheets of thick paper.
5. Mounting adhesive.
6. Electric cable.
7. Acrylic paint.
Also required are connectors, suspensions, profiles for equipping a false ceiling.
To create a "star" ceiling, you need to have certain tools: a knife, brush, drill, screwdriver, spray gun.
 Additional effects on the starry ceiling
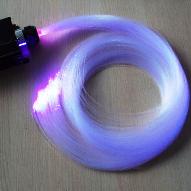
If you have a halogen projector, then usually there is a special lamp and a color filter in it. This filter can usually rotate. This changes the brightness and color of the light fibers. A similar system is the basis of many other dynamic effects.
The LED projector, as the name implies, uses LEDs. LEDs are controlled by a controller. The same controller turns on / off different lighting programs. The controller can set such effects: rotating galaxies, falling meteors and flying comets, exploding or twinkling stars. To create the effect you need to buy the appropriate projector model.
Star ceiling installation.
1. Mark the fixtures before mounting the suspended ceiling.
2. Drill holes with a drill. After that, attach the suspensions to the supporting ceiling and walls using screws.
3. Mount the frame from profiles of appropriate sizes and strength. Connect profiles with suspensions.When installing the frame system, use the usual technology for its installation. The minimum distance from sheets to the ceiling is 3 cm.
4. Mount the sheet material to the structure. This material will be the basis of the "star" ceiling.
5. Make a separate conclusion for wiring. This pin should be near the projector, controller, and other equipment. Install the switch in a convenient location.
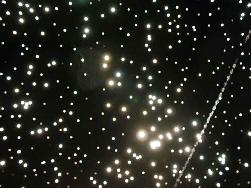 6. Drill many holes in the sheet material with a drill. The diameter of the holes is 1.5-2 mm. It is optimal to place 60 or 80 holes per square meter of ceiling.
7. Glue several optical fibers into each hole. Optionally glue 1-3 pieces.
8. Opposite ends of the fibers should be assembled into projector optical port.
The mounted star ceiling can be decorated with acrylics. Acrylic paints are endowed with a number of undeniable advantages. So, these paints are made on a water basis. Accordingly, they do not contain chemically harmful diluents and do not exude an unpleasant aroma.
Acrylic paints dry quickly. In this case, a polymer film is formed, which is resistant to chemical and mechanical influences. Drawing can be created by a professional artist. But you can also create it yourself - according to the template.
The patterned pattern for the ceiling "starry sky" is created as follows:
1. On the template paper, pre-copy the desired pattern or pattern. It can be a planet, a zodiac sign or a galaxy. To ensure greater rigidity of the sheet, it can be varnished or waterproof material used.
2. Now you can cut the pattern with a sharp knife.
3. Attach the masking tape to the ceiling.
4. Spray with a spray brush or brush according to the created template.
After that, your star ceiling will look irresistible. Turn on the projector and enjoy the results of the work done!
Ceiling "Starry sky"
See also at i.electricianexp.com
:

